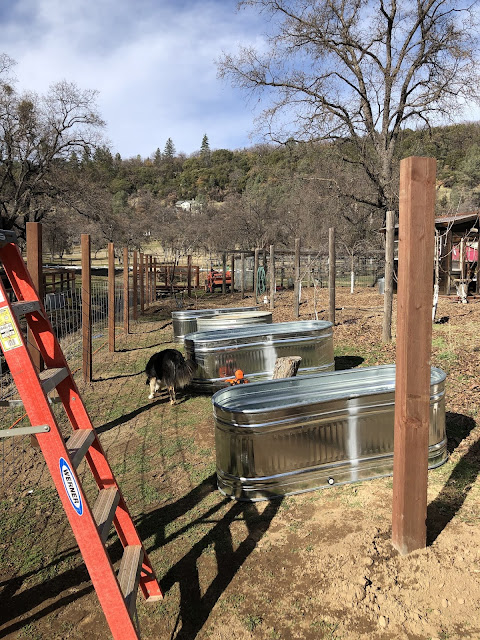
Since I retired a bit more than a year ago, I have been a gardening fiend. I planted a few more fruit trees a few years ago, outside of the garden since there was no more room inside. Then, last summer, I didn't have enough raised beds for all the veggies I wanted to plant. Brett suggested moving the deer fence back, between the newer fruit trees and the stream. There would be room for some more raised beds in the new area as well as including the fruit trees in the protected orchard. How could I say no? Normally, this is the kind of project that we would do with the help of Wwoofers, but since there aren't any due to COVID, and since Brett goes stir crazy without a project, he moved the fence back by himself.
We picked up some large water troughs to use as raised beds. He drilled some holes in the bottom and put them in place. I looked at them and thought, "It's going to cost me a small fortune in raised bed potting soil to fill those things."
Then I had a flash of inspiration. Hugelkultur. I learned a little bit about this in my Master Gardener class, the demonstration gardens have one, and a fellow Master Gardener friend successfully used it for her raised beds last year. I did some review, asked a few questions, and got to work.
Hugelkultur is method of creating a hill ("hugel") that mimics the decomposition that occurs on a forest floor. The activity at the bottom of the pile creates nutrients as it breaks down, and it holds moisture really well. The hills are most often free standing, but sides can be put in place. And, what is a raised bed, really, other than a hill with sides?
First, I gathered downed twigs and small (less than 3 inch in diameter) limbs from around the ranch. Brett took his tractor out to the back of the property and gathered there, while I picked up in the pastures. We have had a fair amount of windy weather so there was a lot to choose from. Pine is better than oak so I made those a priority although we have more oaks than pines on the ranch.
I put a layer of twigs in the bottom of the troughs and stomped on them to break them up and provide a nice even base.
Next came the limbs and then a layer of straw. I stomped on it again and watered it well. The straw snugged into the crevices between the limbs.
The next layer was compost. Brett brought it over with the tractor and dumped it. While I was spreading, stomping and watering, he went and got the next load.
At this point, the troughs were between 2/3 and 3/4 full. The top layer will be potting soil. The new raised beds will sit and mellow and settle for a few months until they are planted in the spring. I’ll report back on how it goes.


Well now, isn't that interesting. It sounds like a great idea.
ReplyDelete<3 This! Great photos & your blog is really well written... now alls I need is a property & tractor, Lol!! Happy Planting & thanks for sharing your progress- very inspiring!
ReplyDeleteVery cool idea. Thanks for sharing that. In other words, it’s time to get busy if we want to make our own planters.
ReplyDelete